안드로이드 개발을 하면서 당연히 알아야 하는 내용이며, 가장 기본중의 기본이다.
안드로이드에서는 버튼, 텍스트뷰, 이미지뷰 등의 기본 위젯들을 제공한다.
기본 위젯을 사용하기에 앞서 사용자 인터페이스 부터 확인해보자.
1. 사용자 인터페이스
사용자 인터페이스. 흔히 User Interface의 약자인 UI라고 부르는 것을 말한다.
안드로이드는 모바일 환경에 특화된 버튼, 리스트, 스크롤, 메뉴, 체크박스 등을 따로 제공한다.
UI 요소들을 크게 분류하면 View와 ViewGroup으로 나눌 수 있다.
간단히 정리하면 다음과 같다.
- 뷰(View)
화면을 구성하는 요소인 위젯이다. - 뷰 그룹(ViewGroup)
위젯을 담는 컨테이너 역할을 한다.
2. UI의 작성 절차
먼저 뷰그룹(레이아웃)을 생성하고 여기에 필요한 뷰들을 추가한다.
UI 작성이 끝나면 액티비티의 setContentView()를 호출하여 액티비티 화면으로 설정한다.
<?xml version="1.0" encoding="utf-8"?>
<LinearLayout xmlns:android="http://schemas.android.com/apk/res/android"
    xmlns:app="http://schemas.android.com/apk/res-auto"
    xmlns:tools="http://schemas.android.com/tools"
    android:layout_width="match_parent"
    android:layout_height="match_parent"
    android:orientation="vertical"
    android:gravity="center"
    tools:context=".MainActivity">

    <TextView
        android:id="@+id/textView"
        android:layout_width="wrap_content"
        android:layout_height="wrap_content"
        android:text="Hello World!"
        app:layout_constraintBottom_toBottomOf="parent"
        app:layout_constraintLeft_toLeftOf="parent"
        app:layout_constraintRight_toRightOf="parent"
        app:layout_constraintTop_toTopOf="parent" />

    <Button
        android:id="@+id/button"
        android:layout_width="wrap_content"
        android:layout_height="wrap_content"
        android:text="Button"
        app:layout_constraintEnd_toEndOf="parent"
        app:layout_constraintStart_toStartOf="parent"
        app:layout_constraintTop_toTopOf="parent" />

    <RadioButton
        android:id="@+id/radioButton"
        android:layout_width="wrap_content"
        android:layout_height="wrap_content"
        android:text="RadioButton"
        app:layout_constraintEnd_toEndOf="parent"
        app:layout_constraintStart_toStartOf="parent"
        app:layout_constraintTop_toBottomOf="@+id/button" />

    <CheckBox
        android:id="@+id/checkBox"
        android:layout_width="wrap_content"
        android:layout_height="wrap_content"
        android:text="CheckBox"
        app:layout_constraintBottom_toBottomOf="parent"
        app:layout_constraintStart_toStartOf="parent"
        app:layout_constraintTop_toBottomOf="@+id/radioButton" />

    <Switch
        android:id="@+id/switch1"
        android:layout_width="wrap_content"
        android:layout_height="wrap_content"
        android:text="Switch"
        app:layout_constraintEnd_toEndOf="parent"
        app:layout_constraintTop_toBottomOf="@+id/checkBox" />

</LinearLayout>
먼저 xml 파일에서 LinearLayout 태그로 레이아웃을 구성한다.
<LinearLayout> 태그 안에 필요한 뷰들을 추가한다.
<TextView>, <Button>, <RadioButton>, <CheckBox>, <Switch> 등의 뷰들을 추가할 수 있다.
package com.minsuuuus.test;

import androidx.appcompat.app.AppCompatActivity;
import android.os.Bundle;

public class MainActivity extends AppCompatActivity {

    @Override
    protected void onCreate(Bundle savedInstanceState) {
        super.onCreate(savedInstanceState);
        setContentView(R.layout.activity_main);
    }
}
xml 파일에서 작성한 레이아웃을 보여줄 자바코드를 작성한다.
특별한 것은 없고 setContentView()에 R.layout.activity_main을 연결하면 된다.
결과물은 다음과 같다.
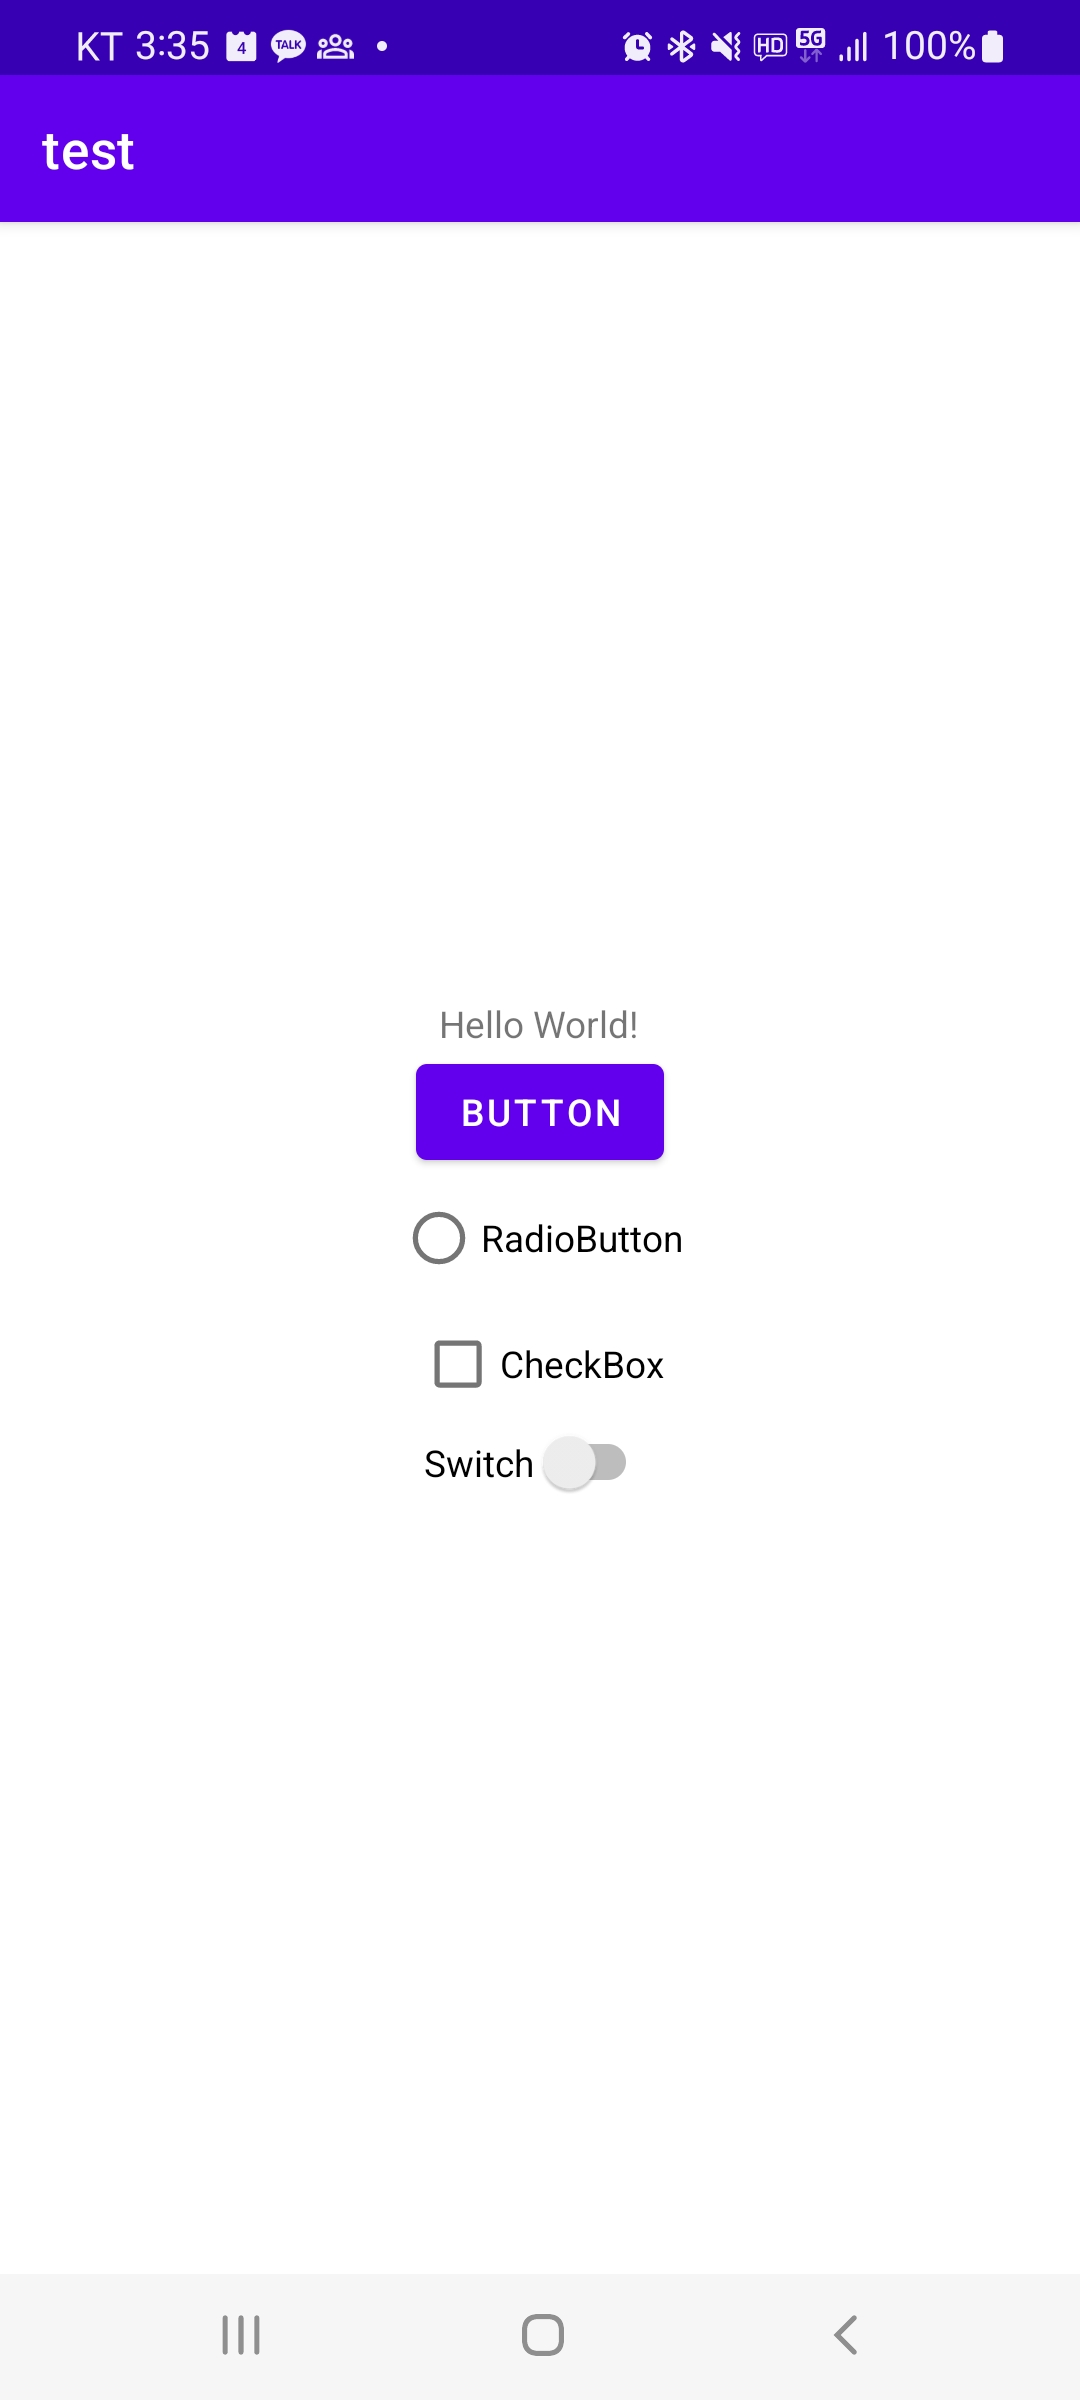
UI 작성절차를 정리하면 다음과 같다.
- 뷰 그룹 생성
- 필요한 뷰 추가
- 액티비티 화면으로 설정
3. 위젯의 종류
먼저 위젯 클래스들에 대해 살펴보자.
위젯 클래스 계층도는 다음과 같다.

이번에는 자주 사용하는 안드로이드 위젯들에 대해 살펴보자.
레이아웃 xml 파일에 보면 다음과 같은 위젯들이 자주 사용된다.
- Button
클릭할 수 있는 푸시 버튼 - EditText
편집이 가능한 텍스트 필드 - TextView
편집이 불가능한 텍스트 - CheckBox
사용자가 체크할 수 있는 On/Off 스위치 - RadioButton
그룹에서 하나의 옵션만 선택할 수 있음. - ToggleButton
라이트 인디케이터가 있는 On/Off 버튼 - Switch
On/Off 스위치 버튼
안드로이드의 모든 위젯은 View 클래스를 상속하여 만들어진다.
레이아웃은 ViewGroup 클래스를 상속하여 작성된다.
레이아웃에 대한 자세한 내용은 다음 포스팅에서 학습하자.
'Android > Android Basic' 카테고리의 다른 글
| 안드로이드 자바코드 레이아웃 구현 (0) | 2023.01.09 |
|---|---|
| 안드로이드 기본 레이아웃 LinearLayout, RelativeLayout, FrameLayout (0) | 2023.01.06 |
| 안드로이드 기본 위젯 TextView, Button, EditText, ImageView (0) | 2023.01.05 |
| 안드로이드 어플리케이션 기본 구조 (0) | 2023.01.04 |
| 안드로이드 스튜디오 설치(2021.05.24. 기준) (0) | 2023.01.02 |


댓글